Wednesday, March 27, 2013

Leap Motion in Gentoo Linux

Great news for those of you with Leap Motion developer kits, today's 0.7.6 release of the SDK adds linux support. Their package targets ubuntu specifically but I was able to get it working on a gentoo system as well. Here's a preliminary write up of what I did:
  1. Download the 0.7.6 SDK (if you're a Leap developer you know how to get it)
  2. move the developer kit tarball to a convenient temp directory
  3. tar xvzf Leap_Developer_Kit_0.7.6_3012_Linux.tar.gz
  4. this will extract the debian packages- for gentoo we can convert to tarball in the next step using alien.
  5. alien -t Leap-0.7.6-x64.deb
  6. Note: if you're on a 32-bit system use Leap-0.7.6-x86.deb
  7. tar xvzf leap-0.7.6.tgz
  8. the previous step extracted usr and etc directories so now we copy the files from these directories into place:
    sudo cp -ir usr/local/* /usr/local/
    Note that I use -i flag to avoid accidentally overwriting existing files. I wound up just copying all the files into place rather than just the leap-specific ones because the Leap installer has bundled versions of QT libraries and trying to use my system QT libraries was causing a segfault.
  9. sudo cp -ir etc/udev/rules.d/* /etc/udev/rules.d/
    Copying those udev rules should in theory allow you to run the Leap application without superuser privileges, but that did not work for me- I will try to figure this out later.
  10. I'm not sure if these next 3 steps are necessary on gentoo, but just in case- they create the plugdev group if it does not exist, add you to that group, and then reload your session so your group membership is updated without having to logout/login.
  11. groupadd plugdev
  12. sudo usermod -a -G plugdev $USER
  13. exec su-l $USER #refresh group membership
  14. sudo Leap

  15. Assuming that /usr/local/bin/ is in your path- you should just be able to run the Leap command in your shell. You need the Leap application running in the background for any other interactions with the leap device to work. Notice that I had to run the command as root even though I copied in the udev rules. In my case, running LeapPipeline(ostensibly the command line alternative to Leap) without root privileges will give an error like: [00:54:08] [Critical] [EC_NO_DEVICE] Please make sure your Leap device is plugged in.
    Running LeapPipeline with root privileges does not give me any error message, just some debug output and then it quits without doing anything. Running Leap without without root privileges in my case will not give any error messages- everything will simply fail silently, i.e. if you run the visualizer you will get no tracking data.
  16. Visualizer
    Test the cool new gesture features with the visualizer by running the Visualizer command and pressing the letter 'o' to enable drawing gestures. In this screenshot I have traced out a counter-clockwise circle with my finger- which is one of the supported gestures so it is drawn as light blue circular arrow. You can do multi-finger swipes, taps, and circles. See this part of the documentation for more details:

Play with the samples

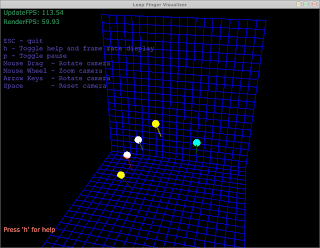
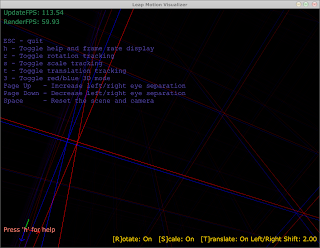
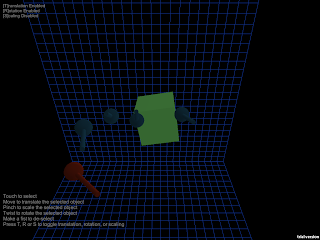
At the top level of the directory where you unpacked Leap_Developer_Kit_0.7.6_3012_Linux.tar.gz you will see an examples directory. Here is what they look like.

FingerVisualizer

MotionVisualizer

UnitySandbox
Some caveats

At some point a .Leap Motion directory needs to be created in your home directory (note the space between the two words and the leading "."). I'm not sure if this is done by the installer or by the first run of the Leap application. In my case I actually copied the contents of the .Leap Motion folder on my ubuntu system to my gentoo system. In particular, there should be two files in this folder a leapid file and a file that is named something like DEV-12345 (yours will be different). The Leap application is actually a GUI app which resides in your dock/panel, if you use one, but it's not necessary- Leap will run without a panel. I've confirmed that it works with xfce4-panel if you want to see it, but you can access almost all the executables directly from the commandline anyway:
  • /usr/local/bin/Visualizer
  • /usr/local/bin/ScreenLocator
  • /usr/local/bin/Recalibrate
  • /usr/local/bin/LeapPipeline
  • /usr/local/bin/Leap
Post questions if you have any problems.

Friday, January 4, 2013

TI MSP430 Launchpad in gentoo linux

Getting started with the MSP430 launchpad in gentoo is pretty straightforward, once you've dug through some documentation. Here's some instructions that should get you up and running.
  1. emerge crossdev

  2. NOTE: Only perform steps 2 and 3 if you do not already have an overlay setup

  3. mkdir /usr/local/portage

  4. add PORTDIR_OVERLAY="/usr/local/portage" to /etc/make.conf

  5. NOTE: Only perform steps 4-6 if /etc/portage/package.env is a file rather than a directory on your system. Also note that the string "x86_64-pc-linux-gnu" needs to match the architecture of your system, which you can find by running gcc -v and checking the string labeled "Target"

  6. mv /etc/portage/package.env /etc/portage/package.env.bak

  7. mkdir /etc/portage/package.env

  8. mv /etc/portage/package.env.bak /etc/portage/package.env/x86_64-pc-linux-gnu

  9. crossdev -s4 -t msp430

  10. -s4 means stage 4 which will build a full gcc, libc,kernel header, and binutils This command will also create /usr/msp430/etc/portage/make.conf which I believe will control how any future msp430 specific packages get emerged.

  11. crossdev --ex-only --ex-gdb -t msp430

  12. Now that you have got gcc going, this command will build just gdb without redoing all the other 4 stages(libc,gcc,etc.)

  13. emerge mspdebug

  14. msp430-gcc -mmcu=msp430g2553 blink.c

  15. Scroll down to the end of this post to find the source code for blink.c Note that my launchpad came prepopulated with a msp430g2553 in the DIP socket, you will want to check what yours came with and set the -mmcu parameter accordingly. The model number is printed on the top of the microcontroller.

  16. sudo mspdebug rf2500

  17. This command will start the debugger which will spew out a bunch of output before displaying a prompt that looks like this:
    (mspdebug)

  18. (mspdebug) prog a.out
  19. Note that you only type the text in bold in the command above, (mspdebug) is just the prompt that is displayed on screen.
  20. hit Ctrl+D to quit the debugger
  21. The microcontroller will start executing code, in this case blinking LED1, LED2 is attached to P1.6

Sunday, December 30, 2012

Wiimote+nunchuk web surfing in linux

At this point, messing around with the wiimote probably seems dated, but hey, I have one lying around with a motionplus and nunchuk. The final outcome of this post if you follow it- you'll be able to control your mouse cursor with the nunchuk analog stick, scroll up/down/left/right with the wiimote d-pad and left/right click with either the wiimote or the nunchuk. Let's get started.

Prerequisites:
  • A wiimote
  • A wiimote nunchuk
  • A linux system with the uinput kernel module
Procedure:
  1. Clone my fork of cwiid into a directory of your choice(wiimouse for example here)
    git clone https://github.com/trtg/cwiid.git wiimouse
  2. cd wiimouse
  3. aclocal
  4. autoconf
  5. ./configure --with-cwiid-config-dir=/etc/cwiid/
  6. make
  7. sudo make install

    Note that by default this will install everything using a prefix of /usr/local unless you pass --prefix=some_other_directory to configure so make sure whatever prefix you use is in your path.
  8. sudo modprobe uinput
  9. Create a new config file for the plugin I wrote by creating the file /etc/cwiid/nunchuk_stick_ptr and adding the text below to it
    include buttons
    Plugin.nunchuk_stick_ptr.X = REL_X
    Plugin.nunchuk_stick_ptr.Y = REL_Y
  10. sudo wminput -c nunchuk_stick_ptr You will see this message appear: Put Wiimote in discoverable mode now (press 1+2)... Do as it says and press buttons 1 and 2 on the wiimote then release them, the LEDs on the wiimote will blink for a while then the terminal where you entered the previous command will say: Ready.
  11. Now try moving the nunchuk analog stick and it should move your cursor around. Adjust /etc/cwiid/wminput/buttons if you want to change button mappings
Note: if you do not want to have to run wminput as root, you can configure things so that uinput may be accessed by users in the wheel users group. To make this happen, create a udev rules file in /etc/udev/rules.d/ with a name of your choosing, for example /etc/udev/rules.d/uinput.rules which contains the following line of text:

KERNEL=="uinput",GROUP="wheel",MODE="0660"

If you've already loaded the uinput kernel module prior to creating this file, you'll have to unload the module:
sudo rmmod uinput
and then reload it:
sudo modprobe uinput
Now you should be able to run wminput without sudo (assuming your user is in the wheel group)

Friday, June 15, 2012

Fat Secret calorie counter access with python

This post complements my earlier discussion of the Withings scale API here:
http://www.keyboardmods.com/2012/05/withings-wifi-scale-python-dashboard.html
I've written a convenience library in python that simplifies the process of retrieving protein, carbohydrate, fat, and calorie data from Fatsecret along with several other features from the REST API. To make use of the library you'll need to register as a developer at the link below:
http://platform.fatsecret.com/api/Default.aspx?screen=r
After registering you will be given a consumer/API key and secret which you will need to use my python library. Once you have your key and secret, download the python library with the following command:

git clone https://github.com/trtg/pyfatsecret.git

The library comes with the example below that demonstrates its usage. To use the example, replace the strings 'your_key_goes_here' and 'your_secret_goes_here' with the key and secret you were assigned after registering as a developer.
Note that the example above makes use of pandas to plot timeseries. You can get the latest pandas with this command:

git clone https://github.com/pydata/pandas.git

I've tested the example above with the stable 0.7.3 release as well.
Once you paste your key and secret into place and install pandas you can run the example as follows:

python example.py

Assuming you already have some data recorded with fatsecret, you should get a plot like the one below after running (click on the image to see a larger copy):

Monday, May 21, 2012

Withings wifi scale python dashboard using matplotlib and pandas

The Withings wifi scale is a great bit of hardware, much more visually appealing than my handmade equivalent and wifi makes it standalone, also a big advantage over my bluetooth scale. I've been using the scale to log my weight and using fatsecret to track caloric intake for a while now and decided it would be nice to make a dashboard integrating data from both sources. The plots on Withings' website leave much to be desired. Thankfully, both Withings and fatsecret have APIs which make third party apps possible. Below I'll show some code that uses the rauth library to access both services. rauth provides OAuth 1.0/a, 2.0, and Ofly consumer support. You can install rauth using easy_install:
sudo easy_install rauth
Before using the Withings and fatsecret APIs, you'll need to register as a developer, you can do that by following the links below:
Withings developer registration:
https://oauth.withings.com/en/partner/add
If you just want to extend the code I provide further down you can fill an arbitrary value for the "Application Website" and "Organization" fields and leave the Callback URL blank. Otherwise, fill in those fields according to your needs. Once you've registered as a developer with both services you will have your Consumer Key and Shared Secret which you will need to send API requests. Now grab my python code from github:

git clone https://github.com/trtg/pywithings.git

The git repo has two files: withings.py(the actual library itself) and example.py (seen below). Open up example.py and fill in your consumer key, consumer secret, and the email address you used to register with Withings as indicated. Using the library is pretty straightforward: instantiate a withings object and then just call get_weights() to retrieve a list of weight measurements and an associated list of dates (in seconds since the epoch format) which you can then use however you'd like. Note that the very first time you run example.py you will be prompted to authorize the app to access your withings account by pasting a URL into your browser. Once you go to that URL and login, you will see a screen like this:
After you click "allow" you will see an oauth token string as shown below. Copy just the part after "oauth_verifier=" , in this case PZBDNyyuxDnGkeMxccY.
Paste the "PZ..." string into your terminal where prompted, hit enter, and you should get a graph like the one below.(Click on the graph to see a larger version) I used the python package pandas to treat the weight data as a time series and get nice date labels on the x-axis as well as to plot the smooth red rolling average of the data.
In an upcoming post, I'll discuss similar code that retrieves data from fatsecret to generate plots like the one below:

Wednesday, January 11, 2012

Gymnastics tap swing trainer

Timing is one of the things I've found most difficult to pick up while learning basic gymnastics. This is especially true when it comes to high bar/strap bar giants and tap swings. If I just blindly practice, I tend to tap far too early. For back giants, the tap is the moment when you transition from a hollow to an arch then back to a hollow again. To facilitate switching from hollow to arch at the right time I built the device you see in the video below. I suspect it would also work well for kip timing (it would tell you when to bring toes to the bar). It's basically a beam break sensor, like you might have at the bottom of your garage door, except it runs on batteries and beeps whenever something crosses between the flashlight and sensor. The idea is that you place the flashlight and sensor on either side of the high-bar at the location where you should ideally tap and then as you swing you just wait to hear the beep before switching from hollow to arch.


Here you can see and hear the tap trainer in action- I know my form is terrible, the video is just to show you how the device works. That high pitched beep you hear every time I approach maybe 30 degrees away from vertical is the sensor detecting me crossing its path and then beeping.

Monday, October 17, 2011

Kinect speech recognition in linux

Audio support is now part of libfreenect. Additionally it is now possible to load the microsoft SDK version of the audio firmware from linux courtesy of a utility called kinect_upload_fw written by Antonio Ospite.This version of the firmware makes the kinect appear to your computer as a standard USB microphone.
This means you can now record audio using your kinect, but that's not all that interesting in and of itself. Linux support for speech recognition at this point is not all that great. It is possible to run dragon naturallyspeaking via wine or to use the sphinx project (after much training), but neither of those approaches really appealed to me for simple voice commands (as opposed to dictation). The google android project happens to include a speech recognizer from Nuance which by default is meant to be built for an ARM target, like your phone. After extensive hacking around the build system I was able to instead build for an x86 target, like your desktop. Now, you can combine these two things- kinect array microphone + android voice recognition to do some more interesting things, i.e. toggle hand tracking on and off via voice.


How to get started:

1) Check if you have the "unbuffer" application which is part of the linux scripting language called expect:

which unbuffer

If the above command comes up empty you should download a copy of unbuffer from the link here:
http://dl.dropbox.com/u/11217419/unbuffer

copy unbuffer to a directory that is in your path, like /usr/local/bin or ~/bin

2)Download my precompiled version of the srec subproject from here:
http://dl.dropbox.com/u/11217419/srec_kinect.tgz

3)save the tarball from step 1 in a convenient directory then unpack it with this command:
tar xfz srec_kinect.tgz

4)switch into the subdirectory where I've placed some convenience scripts:
cd srec/config/en.us

5) Open a second terminal and in that second terminal also switch into srec/config/en.us

6) In the first terminal execute
./run_SRecTestAudio.sh
and in the other terminal execute
cat speech_fifo

7) try speaking into your microphone and wait for recognition results to appear in both terminals. Note that the vocabulary as configured at this point is very small- words like up,down,left,right and the numbers from 1-9 should be recognized properly.

Integrating the kinect:
1)Acquire Antonio Ospite's firmware tools like so:
git clone http://git.ao2.it/kinect-audio-setup.git/

2)move into the kinect-audio-setup subdirectory:
cd kinect-audio-setup

3)build kinect_upload_fw as root:
make install

4)Fetch and extract the microsoft kinect SDK audio firmware (depending on your directory permissions, this may also need to be run as root):
./kinect_fetch_fw /lib/firmware/kinect

This will extract the firmware to this location by default:
/lib/firmware/kinect/UACFirmware.C9C6E852_35A3_41DC_A57D_BDDEB43DFD04

5)Upload the newly extracted firmware to the kinect:
kinect_upload_fw /lib/firmware/kinect/UACFirmware.C9C6E852_35A3_41DC_A57D_BDDEB43DFD04

6)Check for a new USB audio device in your dmesg output

7)Configure the kinect USB audio device to be your primary microphone input and
try out run_SRecTestAudio.sh again as described earlier.


Additional Notes:

I unfortunately no longer remember all the changes I had to make in order for the srec project within android build for x86. Perhaps someone with better knowledge of the android build system can chime in at the comments below. In the interim, use the precompiled copy that I have linked above, just be aware that it is old, I think it dates back to the froyo branch of android or earlier (I compiled it a long time ago). If you want to take a shot at building the latest srec yourself, check out the android source code then look under external/srec/

The run_SRecTestAudio.sh script sets up the speech recognizer to run on live audio and pipes the recognition results to a fifo in the same directory called speech_fifo. Running cat in the second terminal lets you read out the recognition results as they arrive. Instead of cat you could alternatively have whatever programs needs recognition results read from the fifo and act accordingly. Unbuffer is used to make sure you see recognition results right away rather than waiting for the speech_fifo to fill up.

The srec recognizer does not require any training but has certain limitations. The most significant limitation is the vocabulary it can recognize. The larger the vocabulary you specify, the less accurate the recognition results will likely be. As a result this recognizer is best used for a small set of frequently used voice commands. Under srec/config/en.us/grammars/ there are a number of .grxml files which define what words the recognizer can understand. You can define your own simple grammar (.grxml) here which, for example, only recognizes the digits on a phone keypad. To do this you can follow the syntax of any of the other .grxml files in the directory and then execute run_compile_grammars.sh which will produce a .g2g file from the .grxml file. There is also a voicetag/texttag file with extension .tcp which needs to point to the g2g file of your choice. You can find the .tcp files under the srec/config/en.us/tcp directory. run_SRecTestAudio.sh points to a tcp file which you can specify.